How to swap the way your DC-X Series fridge door opens
- Date Published: 8 January 2025
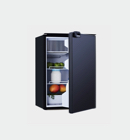
- DC-X Upright (50L, 65L, 85L, 130L)

Your Bushman DC-X Series fridge comes with the door hinges fitted to the right hand side from factory. You can swap these to the left hand side if that suits your set up better.
You will need
- A drill with a 2mm drill bit
- Phillips head screw driver
- Heat gun
Swap the hinge to the other side
- Position the fridge on a bench with the front edge overhanging so you can access the bottom hinge screws.
- Unscrew and remove the top metal door catch
- Unscrew and remove the top hinge
- Gently lift off the main door
- Unscrew the bottom hinge. If there is a small washer on the bottom hinge, make sure this doesn’t stick to the bottom of the fridge door!
- Unscrew and remove the lower door support bar on the left hand side and move this to the right side.
- Reposition the bottom hinge on the left side and do the screws up finger tight only for now.
- Sit the main door onto the bottom hinge (with the washer).
- Affix the top hinge and screws, also finger tight only.
- Twist the door anti-clockwise so it is square to the fridge cabinet. Get someone to hold the door in that position and tighten all the hinge screws hand tight. Do not over tighten the hinge screws or they will no longer bite.
- Check the door opens and closes freely without rubbing on the lower metal door support. It should sit 1 or 2mm above that metal plate.
Move the door handles
- Remove the 2 screws which hold the door handle in place. Access is provided under the logo sticker. You can more easily remove the sticker by applying moderate heat from a hair dryer or heat gun
- Gently lift the door handle off
- Reposition the door handle on the preferred side.
- Drill 2 small (2mm) pilot holes through the door handle and 10mm deep into the door panel (there is a metal sheet behind the door panel that the screws bite into, make sure you drill through this).
- Reaffix the door handle using the original screws, hand tight.
- Reapply the logo sticker onto the door handle by applying moderate heat to the sticker. We also supply spare door handle stickers with every fridge in the owners manual pack.
- Drill out the original door handle holes with a 3mm drill bit. Use the supplied 2 x small black plastic push rivets to fill the holes.
Adjust the door latch
- Refit the top metal door catch
- Tighten the screws finger tight.
- Move the door catch rail towards the rear of the fridge cabinet until the plastic door latch just makes light contact. If there is more than 1mm of movement, this will need adjusting.
- Once this is in the right position, do the screws up hand tight.
Rubber door seals
It is important that your rubber door seals are making contact 100% of the way around the fridge cabinet. There are magnets inside the rubber seal which pull towards the metal fridge cabinet to keep it airtight that may need to be adjusted.
- After you have adjusted your door latch, check to see that the rubber seal is making contact with the fridge cabinet on all 4 sides. If there is even a small gap, this will affect the performance of your fridge. The most common place we see gaps are in the corners.
- Place a bright torch inside the fridge and close the fridge door gently. Look for any light bleeding out, even a thin slither.
- Grab a heat gun, and with the fridge door closed, start from a corner, gently heat up the rubber seal with light heat from a heat gun (be careful not to overheat the rubber or it will melt). As the rubber heats up, the magnets inside will pull the seal towards the fridge cabinet. Slowly work your way along the rubber from one corner to the other until it is fully sealed.
- Leave the door closed in this position for 10 minutes for the seal to cool down in this position.


 Bushman Fridges